What are end-to-end tests and how do you carry them out?
December 29, 2019

What is testing?
Testing is a process, a working method and a tool whose purpose is to identify defects in software, with the ultimate goal of helping reach an acceptable degree of maturity and stability in an application.
According to the testing pyramid, there are several levels:
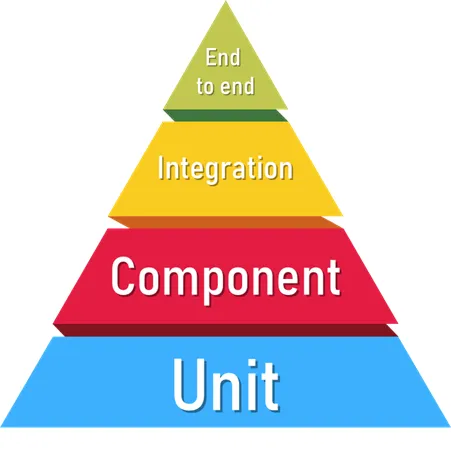
Unit Test: allows testing the most fundamental elements of software such as objects, functions, events, etc.
Component Tests: allow identifying flaws in components that include several functions or internal elements.
Integration Tests: allow testing the behavior and possible failures in the interaction between components with each other, and other elements of the software.
GUI Test or End-to-end Tests: allow us to identify flaws in the user interface. It is the most elaborate type of testing that exists, because it depends on the other levels.
What is end-to-end testing?
It is a software testing methodology that consists of testing an application from the end user’s point of view. This type of testing covers flows and processes, for example: user registration, login, adding an item to the cart, generating an invoice, etc.
Why use end-to-end testing?
Although end-to-end testing does not replace any of the other tests, such as unit, component or integration testing, this methodology offers the end user’s point of view.
It allows us to identify errors in the user interface.
How do you do end-to-end testing?
Currently there are several tools, such as Selenium with Mocha and Chai, that can help with this purpose. However, it is recommended to use Cypress since it is an all-in-one framework that includes all the required functionality.
Prerequisites:
- Knowledge of JavaScript
- A node project
Before starting with end-to-end tests, we need to install Cypress in our node project with the following command:
npm install cypress --save-devTo make it easier to open the Cypress console, we add the following script to our package.json:
"scripts": { "cypress-open": "cypress open --project ./tests"},Where ”./tests” is the folder where the tests will be saved. Once we run the command “npm run cypress-open”, the Cypress console will open.
If it’s the first time the command is run, inside the “tests” folder, the “cypress” folder will be created with several example tests in “tests/cypress/integration/examples”.
Note: For Cypress classes to be recognized in the js files and to have intellisense, it is necessary to create the file ”./tests/cypress/tsconfig.json” with the following content:
{ "compilerOptions": { "allowJs": true, "baseUrl": "../node_modules", "types": [ "cypress" ] }, "include": [ "**/*.*" ]}To create our tests we need to create a javascript file in the folder ”./tests/cypress/integration”.
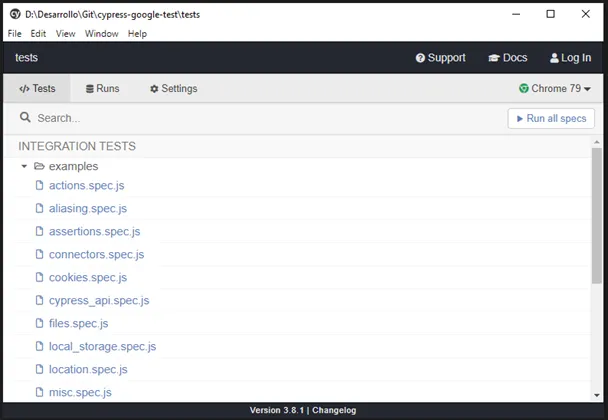
Basic example
In this post I will try to show how to do basic end-to-end tests on www.google.com:
1. First we configure the file ”./tests/cypress.json” with the following content:
{ "baseUrl": "http://www.google.com"}2. Then we create the file for the tests ”./tests/cypress/integration/google.spec.js”.
3. Next, what we’ll do is describe the test with the describe method:
describe('Basic Google tests', () => {});4. The first test will be quite simple; for it we’ll use the it method, we’ll visit the www.google.com page and validate that it happens correctly:
describe('Basic Google tests', () => { it('Visit google.com', () => { cy.visit('/'); cy.wait(3000); cy.url().should('match', /www.google.com/i); }); });The result is that the url of www.google.com is visited, it waits 3 seconds and validates the url.

5. The next test will validate that the logo, search field and search buttons are visible:
describe('Basic Google tests', () => { it.skip('Visit google.com', () => { cy.visit('/'); cy.wait(3000); cy.url().should('match', /www.google.com/i); }); it('Visible components', () => { cy.visit('/'); cy.wait(3000); cy.get('#hplogo').should('be.visible'); cy.get('input.gLFyf').should('be.visible'); cy.get('.FPdoLc > center > .gNO89b').should('be.visible'); cy.get('.FPdoLc > center > .RNmpXc').should('be.visible'); });});The result is that it visits the url of www.google.com, gets the logo and validates that it is visible, gets the search field and validates that it is visible, gets the search buttons and validates that they are visible.
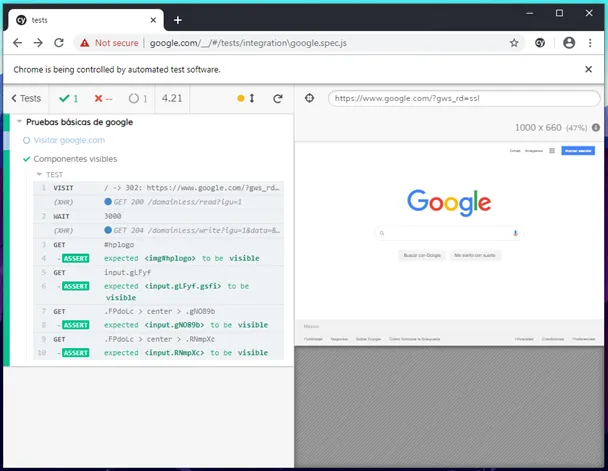
6. The next test will validate the search:
describe('Basic Google tests', () => { it.skip('Visit google.com', () => { cy.visit('/'); cy.wait(3000); cy.url().should('match', /www.google.com/i); }); it.skip('Visible components', () => { cy.visit('/'); cy.wait(3000); cy.get('#hplogo').should('be.visible'); cy.get('input.gLFyf').should('be.visible'); cy.get('.FPdoLc > center > .gNO89b').should('be.visible'); cy.get('.FPdoLc > center > .RNmpXc').should('be.visible'); }); it('Search', () => { cy.visit('/'); cy.wait(3000); cy.get('input.gLFyf').type('Cypress'); cy.get('.aajZCb > .tfB0Bf > center > .gNO89b').click(); cy.wait(3000); cy.get('.g .rc').should('have.length.greaterThan', 1); cy.get('.csb').should('have.length.greaterThan', 1); });});You can find this basic example in the following git project: https://github.com/anayarojo/cypress-google-test
To dive deeper into end-to-end testing and how to implement it with Cypress, you can find more information at: https://www.cypress.io/

Leave your comment